Metallic Thread — Add some Glitz!

posted in: Classes, Thread | 0

Hope you are enjoying my conversations about various threads and needles and decorative stitching.  No thoughts would be complete without talking about metallic thread.  I can already hear the “ugh’s” and “My machine doesn’t like that thread”…  I am here to tell you that your machine doesn’t really know what he likes.  He knows how he likes it presented to him.  (Have you noticed that I always refer to my machine as “he”? Not sure what that is about, but maybe it’s the only “he” that ever does what I ask!!)
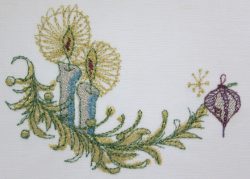
 

Machine Embroidery with metallic thread


It doesn’t matter if you are using your embroidery machine, free motion quilting or doing controlled decorative stitching on your sewing machine, I have a “cheat sheet” that will help you with the correct way to present metallic thread to your sewing machine.

The design to the right was done on my Brother Dream Machine because it was a built in design. It was totally stitched with metallic thread.  There are 7 colors and 3 different brands, Brother, Sulky and some old Gutterman I had. The results were great with all 3 brands.
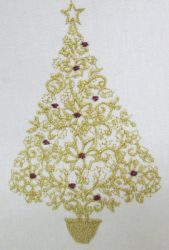


Machine Embroidery and metallic thread


The tree was also done on the embroidery machine and the total run time for the gold metallic was 15 minutes.  I didn’t have any thread breaks.  I actually went off to do something else and came back and I had a tree!

This design would be wonderful on a guest towel for the holidays….just don’t let them use it!!
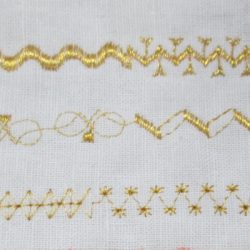


Decorative Stitching with metallic thread
Free motion quilting with metallic thread


Metallic thread also works when you are doing decorative stitching or free motion quilting.  You can use all those great detailed stitches on your machine that don’t really look good if the thread is heavy.

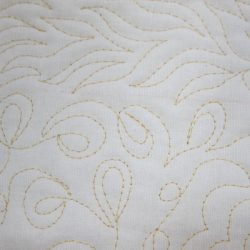
I’m definitely not an expert at free motion quilting, but my doodles look great with metallic thread.  I’m best if I work in a small area at a time.


I don’t have any big secrets to enjoy working with metallic thread, I use some specific settings for my machine:

      1.  Use a good quality metallic thread – not the cheapest thing you can find online or a big box store.  Check with a machine dealer. There is no need to purchase a cone of metallic thread.  It won’t work well on your home sewing machine.
      2.  Put in a new size 90 Metallic or 90 Topstitch needle.
      3.  Use Bottom Line in the bobbin.  Select a color that’s close to the color you are using on the top.  If you are using multiple colors, match your background with your bobbin thread.
      4. Set your top tension to “1”.
      5. Slow down
      6. Use the proper stabilization for your machine embroidery project or decorative stitching.
      7. The most important is how the thread is coming off the spool.  If you set a spool of metallic thread on the table and start pulling thread up, you will quickly see that it starts to twist like a garden hose.  If you pull the thread to the side of the spool and the spool turns with it, you won’t have any issues.  It will come off smoothly.


Thread Director on my Machine
Thread Director

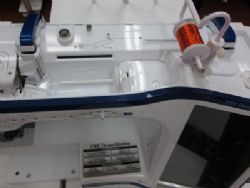
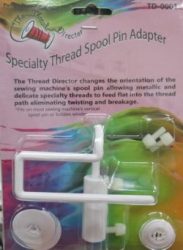
There is an accessory you can get for your machine called The Thread Director.  This little gadget makes it possible for your metallic thread to come off the spool so there are no twists or tangles.

It’s a funny looking gadget. I have a picture of it on my machine with metallic thread. You want to be sure that your spool will turn easily when the thread is pulled off.  Be sure there isn’t anything deterring the free movement such as paper stuck down in the spool hole.  You won’t have this issue with Brother or Sulky threads, but check if you are using another brand.


I hope you will give metallic thread another try if you haven’t had success.  You can find both Brother and Sulky threads on our website as well at the Thread Director.  Don’t forget your Metallic or Topstitch needles.  Check out all our Brother and Sulky Metallic Threads at Metallic Threads.


Invisafil – Hand applique by Machine

posted in: Classes, Thread | 0

I love hand applique, especially if I can do it by machine.  I am a thru and thru machine girl. I want my machine to help me if at all possible.  With a few setting and tension changes, the right needle and Invisafil thread, I can get the look of hand applique while accomplishing it on my machine.  Use Invisafil thread in the top and in the bobbin.  Set your top tension down a number.  My machine’s normal setting is “4” so I lower it to 3.  The thread is so fine and you don’t want the bobbin pulling to the top.

You need to prepare the applique as if it was going to be done by hand.  All the raw edges will need to be turned under using whatever method suits you.  Once that is done, either pin it to the fabric or use a glue stick to hold it in place. Keep the glue on the back in the middle of the applique.  You don’t want to stitch thru it.  You will experience skipped stitches and a gummy needle if you do. I always spray starch my background fabric to give me more support for my stitching.

Applique Stitch


  First select the correct stitch.  Since I can’t give everyone a number to find on their machine, I’ll give you a picture.  You will find it in your Utility Stitches.  There is nothing fancy about this one.  It takes about two stitches straight and then swings to the left.  The trick is to have it swing to the left just enough to catch the fold of your fabric. You will adjust the width of the stitch to be sure it catches just a bit of the fold.   The machine will always take two stitches, but you can determine how long those stitches will be.  Use a bit longer length if your applique has large straight areas.  Use a smaller stitch length if your applique is small or has lots of curves.

Needle drops off the fabric


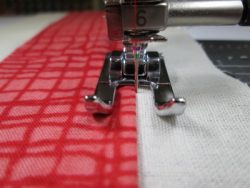
Second, select the correct sewing foot and needle.  I suggest you use a 70 Microtex needle so that you don’t poke a big hole in your work.  You don’t need a large needle to take the Invisafil thread through the fabric.  The foot I suggest is an open-toe foot. This way you will be able to see that your straight stitching will fall just to the right of the fold and the swing to the left will just catch the fold of the fabric.  This is where you will want to do a practice and take a few stitches and try a smaller swing to see if it catches.  Remember, you want just enough to catch the fold of the fabric.


Pulled back to show stitches


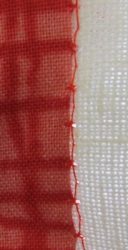
In the picture on the left, I have pulled back the fold so you can see what the stitching looks like.  You can see that the thread is running along the edge of my fabric and the needle swings out to the left to just catch the fold.

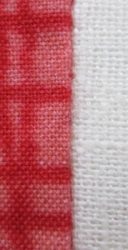
In the picture on the left, I have pushed the fold back over the stitches.  That’s all it takes to hide them.  I get the look of hand applique, but I was able to accomplish it with my sewing machine and Invisafil Thread.

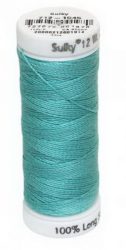
We have a great selection of colors on our website.  All you have to do is pick a color that is “in the ballpark” as the thread is so thin with a matte finish.  It will just blend in.

See the thread at Invisafil Thread and don’t forget to get a 70 Microtex needle.  Hope you will learn how your machine can help you accomplish the look of hand applique.

Decorative Machine Stitching Lesson 1

posted in: Classes, Thread | 0

 I have sold sewing machines for 42 years so I’ve “seen a thing or two”.  Machines have always had decorative stitches, but we didn’t always have a variety of threads.  It’s the thread, needle, tension, and stabilizer combination that makes for successful decorative stitching.  Sounds confusing, but it’s really not when I give you my little “cheat sheets” on how to set your machine.

I do have a disclaimer.  We have been a Brother dealer for about 25 years and an Elna dealer before that.  The information I will share will be directed to the Brother machine for the tension settings, and accessories.  Since Brother makes Babylock sewing machines, you will find the same settings easy to follow.  I can’t speak for other brands, but a sewing machine is a sewing machine with tension settings, stitch selections, needles choices and needed stabilizers.  I feel anything I say will be able to be applied to other machines.

The one with the most decorative stitches doesn’t win here. Most often, the more basic stitches are preferred for heavy threads. In the coming weeks, I will cover settings for working with not only heavy 12 wt thread, but also metallic thread.  I will also show you the set up for bobbin work and various feet for using cords.  All of your practice pieces can be used, even if just for a small accent in a larger project, so don’t toss them!

This lesson we are going to start stitching with 12wt thread in the needle.  Remember, the lower the # of the thread, the thicker it is.  The lowest number that will comfortably go in almost every machine with a 100 Topstitch needle is a 12wt.  You will find that different brands of 12wt will actually be slightly different in weight.  The brand that we have found works consistently in all of the machines we have used is the Sulky Brand.  We have carried several others over the years and always come back to Sulky as the machines easily stitch with this one. We also like this one because you can get small spools on many of their colors.  You will use a different thread on the bobbin so your thread will go a long way when decorative stitching.

The next consideration is the top tension.  Again, simple.   Set it to “1”.  The Brother/Babylock machines have a “normal” tension of 4, so it is considerably looser.  The tension needs to be loose so that your bobbin thread will be able to pull the heavy thread to the backside of your work.  This way, the bobbin thread won’t show. My choice for bobbin thread is Metrosene 50wt.  We need a bobbin thread that is heavy enough to hold down our 12wt thread.  If we have a very light bobbin thread, we won’t be able to loosen the top tension enough to keep the heavy top thread from pulling our bobbin thread up.

You will have better results if you use cotton or cotton/linen blends of fabric as your background.  I always use spray starch to stiffen my fabric.  For all your practice pieces, use Sulky Tear Easy under the fabric.  This is all the stabilizer you will need if you spray starch your cotton or cotton/linen fabric.

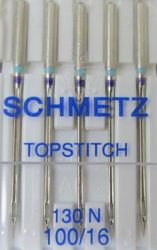
The needle choice is a deal breaker.  It’s simple. Use a 100 Topstitch needle for success.  The very first thing I do when beginning to use a heavy thread is change the needle.  If you have a machine with one of those great automatic needle threaders and you use it without putting in a 100 Topstitch needle, you will bend it and have to have it replaced.  Ask me how I know!.  Always, put in a 100 Topstitch needle FIRST.

Your last consideration is the foot you use on your sewing machine.  For the Brother/Babylock it is the “N” foot.  The “N” foot rests on what I call sliders so that there is a gap to allow the thicker threads to move easily under the foot.  Regardless of what foot your machine suggests, if you are using 12wt thread, use the “N” foot.


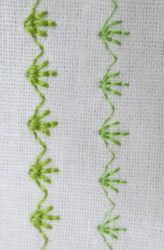
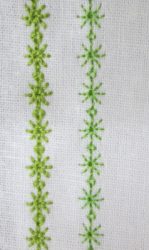
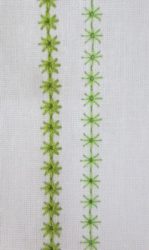
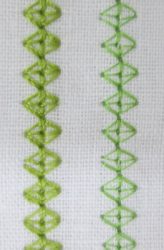
I stitched some samples for you to see the impressive difference in Aurifil 50wt on the right and Sulky 12wt thread on the left.  Each of these samples easily shows how heavy thread can make your stitching look more like hand work.  These are all simple stitches, nothing fancy.

OK…it’s time to try it yourself.  Check off the following and you are ready to go:

  1.  Topstitch size 100 needle in your machine before you begin
  2.  Sulky 12wt cotton thread in the needle
  3.  Metrosene 50wt cotton in the bobbin (match the top thread or the background)
  4. Use the “N” foot for Brother/Babylock.  It rests on sliders to allow for heavy thread.
  5. Set your top tension to “1”
  6. Spray starch your cotton or cotton/linen fabric and use Tear Easy underneath
  7. Select a stitch, change the tension and sew.  Remember, experiment with different widths and lengths for the stitches.


If you need any supplies, you can find them all on our website.

Essex Cotton/Linen

Tear Easy Stabilizer

Sulky 12wt Thread and Topstitch Needle

I hope you will find as much enjoyment in learning your sewing machine as I have had over the years.